")
In today’s creative world, tools like laser engraving machines have opened up endless possibilities for artists, hobbyists, and entrepreneurs. Just as famous artists used simple tools to create masterpieces, you can use laser engraving to craft amazing projects. While laser engraving technology might seem complicated at first, there are many simple and profitable projects that beginners can start with. This guide will explore six of the best-selling laser engraving projects for beginners in 2024, providing tips and ideas to help you succeed.
Why Choose Laser Engraving?
Laser engraving is a process that uses a laser beam to cut or engrave materials like wood, metal, glass, stone, and more. It’s precise, efficient, and allows you to create detailed designs that would be difficult to achieve by hand. For beginners, laser engraving offers:
- Creative Freedom: Make personalized and unique items.
- Business Opportunities: Sell your creations for profit.
- Skill Development: Learn a valuable and modern craft.
Getting Started with Laser Engraving
Before diving into laser engraving projects, it’s essential to understand the basics and prepare properly.
Understanding Your Laser Engraving Machine
- Read the Manual: Familiarize yourself with the machine’s features.
- Safety Precautions: Always follow safety guidelines.
- Software Learning: Get comfortable with design software.
Essential Materials and Tools
- Materials to Engrave: Wood, acrylic, glass, stone, etc.
- Protective Gear: Safety glasses, gloves, and proper ventilation.
- Design Software: Programs like LightBurn, Adobe Illustrator, or CorelDRAW.
Tips for Beginners
To ensure a smooth start and long-term success in laser engraving, consider these tips:
1. Start with Low-Cost Materials
When you’re just starting, it’s a good idea to practice on inexpensive or free materials. This way, you won’t worry about ruining expensive supplies. Some materials you can use are:
- Wood Scraps: Pieces of solid wood left over from other projects.
- Cardboard: Old boxes or packaging materials.
- Paper: Heavy cardstock or craft paper.
- Slate Tiles: Affordable and great for practice.
- River Rocks: Smooth stones you can find outdoors.
Using inexpensive materials reduces the pressure of making mistakes and allows you to experiment freely.
2. Keep Designs Simple
At first, focus on simple designs. This helps you learn how the laser engraving machine works. Start with basic shapes, letters, or simple images. As you gain experience, you can try more complex designs with fine details.
3. Focus on Popular Items
Choose laser engraving projects or laser cutter projects that people often buy. This can help you make money if you decide to sell your creations. Some popular items include:
- Personalized Signs: Names, quotes, or messages engraved on wood or marked on metal.
- Custom Keychains: Small and useful items people love.
- Ornaments: Decorations for holidays or special occasions.
- Drink Coasters: Practical and decorative items for the home.
4. Think Big for Higher Value
While small items are great for practice, larger projects can bring in more profit. Consider making:
- Large Wall Art: Engraved pieces that serve as eye-catching decorations.
- Custom Furniture Accents: Engraved designs on tables or chairs.
- Outdoor Signs: Personalized laser cut signs for gardens or businesses.
- Door and Window Engravings: Unique designs on entryways.
5. Document Your Work
Keep a detailed record of your projects, including:
- Laser Settings: Speed, power, and frequency for different materials.
- Materials Used: Types of wood, acrylic, stone, etc.
- Design Notes: Any adjustments or techniques that worked well.
Documentation helps you replicate successful projects and improves efficiency.
6. Join Online Communities
Connecting with other laser engraving enthusiasts can be very helpful. You can:
- Get Advice: Learn from others’ experiences.
- Find Inspiration: Research laser cut ideas others are creating.
- Ask Questions: Get help with any problems you encounter.
Platforms like Facebook groups, forums, or online classes can be valuable resources.
Safety First
Always prioritize safety when working with laser engraving machines:
- Never Leave the Machine Unattended: Stay nearby while the machine is running. Have
- Have Fire Extinguishers Ready: Keep both small and large fire extinguishers accessible.
- Wear Protective Gear: Use safety glasses and follow the manufacturer’s guidelines.
- Work in a Well-Ventilated Area: Ensure proper ventilation to avoid inhaling fumes.
- Keep Flammable Materials Away: Store them safely to prevent accidents.
Beginner Laser Cutter Projects #1: Map Cutouts and Engraving
Celebrating Places We Love


People have a strong connection to places like their hometowns, favorite cities, or countries. Creating map cutouts and engravings is a popular laser engraving project that resonates with many.
Getting Started with Map Projects
- Select a Location: Choose a state, country, or city map to work with.
- Find a Vector File: Use online resources to find free map outlines.
- Choose the Material: Wood is a great material for this project.
Step-by-Step Guide
- Prepare the Design: Import the map file into your design software.
- Adjust the Size: Decide how big you want the final product to be.
- Set Up the Laser Engraver: Input the correct settings for your material.
- Test on Cardboard: Do a test run on cardboard to ensure everything is correct.
- Engrave and Cut: Proceed with engraving and cutting the final material.
- Finish the Product: Sand any rough edges and apply a finish if desired.
- Add Personal Touches: Include symbols like hearts to mark specific locations.
Ideas for Map Projects
- Ornaments: Small map cutouts for decorations.
- Framed Art: Engraved maps placed in frames for wall décor.
- Coasters: Map engravings on wooden or stone coasters.
- Keychains: Miniature map cutouts as keychains.
- Wall Hangings: Larger maps as statement pieces.
Tips for Success
- Use Simple Designs: Start with basic outlines before adding more details.
- Personalize: Add a heart or star to mark a specific location.
- Experiment with Materials: Try different woods or acrylics for varied effects.
- Offer Customization: Allow customers to request specific areas or landmarks.

Once you learn to laser cut and engrave wood using any US State file here, a world of opportunities opens up for laser cutting projects of all sizes!
Laser Engraving Project #2: Wine Barrels and Furniture
Adding Charm to Wine Accessories


Wine barrels and barrel heads are unique items that can be enhanced with laser engraving. This project is perfect for those looking to create something special and eye-catching.
Why Choose This Project
- Unique Appeal: Engraved wine barrels are distinctive and stylish.
- High Demand: Wineries, restaurants, and wine enthusiasts appreciate custom pieces.
- Versatility: Can be used as décor, furniture, or functional laser engraved items.
How to Start Engraving Wine Barrels
- Begin with Barrel Heads: Start with the flat surface of a barrel head before moving to full barrels.
- Design Ideas: Consider engraving logos, names, dates, or images like grapes or vineyards.
- Prepare the Surface: Ensure the wood is clean and smooth.
- Adjust for Curved Surfaces: Use attachments or settings that allow engraving on curved items.
- Engrave Carefully: Take your time to ensure precision.
- Apply a Protective Finish: Use varnish or sealant to protect the engraving.
Expanding to Furniture
- Tables: Engrave designs on wooden tabletops.
- Chairs: Add decorative elements to wooden chairs.
- Shelves: Create custom wine racks with engraved details.
- Bar Accessories: Engrave on wooden wine boxes or serving trays.
Tips for Success
- Offer Customization: Let customers choose their custom laser designs.
- Partner with Local Businesses: Work with wineries or shops to sell your engraved items.
- Showcase Your Work: Take high-quality photos in a unique and stylish way to attract more customers.
- Attend Wine Festivals: Display your products at events.
Laser Cutting Project #3: Layered Wood Signs
Creating Depth and Dimension


Laser cut layered wood signs involve cutting out letters or shapes and attaching them to a base, creating a three-dimensional effect that serve as visually appealing laser cutter projects.
Steps for Creating a Layered Laser Cut Design
- Design the Sign: Use design software to create the layout.
- Cut Out the Pieces: Use the laser engraver to cut letters or shapes from wood.
- Prepare the Base: Choose a contrasting wood or color for the background.
- Assemble the Sign: Carefully glue the cut-outs onto the base.
- Add Finishing Touches: Sand, paint, or stain the sign as desired.
- Seal the Wood: Use a clear coat to protect the sign.
Ideas for Layered Signs
- Family Names: Create a sign featuring a family’s last name.
- Business Signs: Make signs for shops or offices.
- Inspirational Quotes: Layered words or phrases for motivation.
- Children’s Room Décor: Fun designs for kids’ rooms are one of the more popular laser cutter projects.
Tips for Success
- Use Quality Adhesive: Ensure the pieces stay securely attached.
- Experiment with Colors: Paint the layers in different colors for contrast.
- Offer Different Styles: Use various fonts or shapes to appeal to different tastes.
- Provide Hanging Hardware: Include hooks or sawtooth hangers.
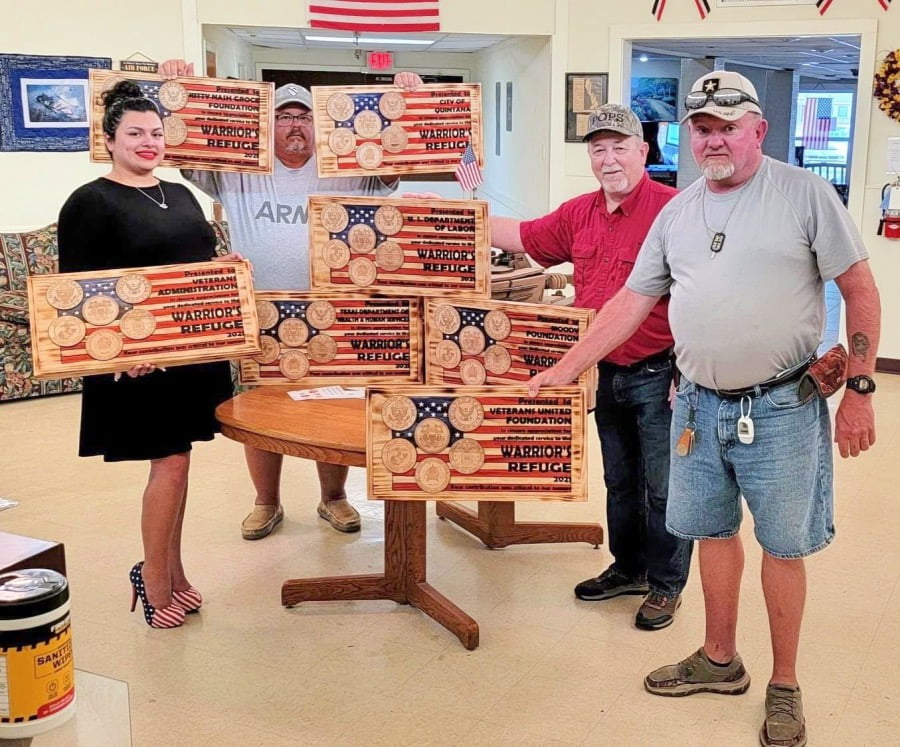
Laser Engraving Project #4: Wood Plaques
Timeless and Versatile Creations


Laser engraved wood plaques are classic items that can serve many purposes, such as awards, signs, or decorative pieces.
Creating Wood Plaques
- Select the Wood Type: Choose from pine, oak, cherry, or other woods.
- Design the Engraving: Decide on the text and images.
- Prepare the Wood: Sand and clean the surface.
- Set Up the Engraver: Adjust settings based on the wood type.
- Engrave the Design: Proceed to laser cut and engrave.
- Apply a Finish: Use varnish, stain, or paint to protect the plaque.
- Add Embellishments: Consider adding metal plates or decorative edges.

Uses for Wood Plaques
- Awards and Recognition: Engraved plaques for achievements.
- Memorials: Commemorative plaques for loved ones.
- Decorative Signs: Welcome signs or house numbers.
- Educational Gifts: Teacher appreciation plaques.
Laser Engraving Project #5: Stone Tile & Plaques
Working with Granite and Slate

Engraving on stone materials like granite and slate adds a touch of elegance to any project.
Benefits of Stone Engraving
- Durable Products: Stone items last a long time.
- High-Quality Look: Stone engravings appear professional and premium.
- Unique Market: Not as many people work with stone, so there’s less competition.
Steps to Engrave Stone
- Choose the Stone: Slate tiles are great for beginners.
- Prepare the Design: High-contrast images work best.
- Adjust the Laser Settings: Stone requires different settings than wood.
- Test First: Always do a small test engraving.
- Clean the Stone: After engraving, wipe away any residue.
- Apply Sealant: Protect the engraving with a stone sealant.
Ideas for Stone Engraving
- Memorial Stones: For pets or loved ones.
- Garden Décor: Engraved stones for pathways or gardens.
- Coasters: Stone coasters with custom designs.
- Address Plaques: Durable outdoor signs.
Tips for Success
- Handle with Care: Stone can be heavy and fragile.
- Offer Customization: Personal messages or images make the items special.
- Package Securely: Use proper packaging to prevent damage during shipping.
- Educate Customers: Provide care instructions for stone items.


Although AP Lazer was designed to handle large objects like granite memorials, don’t let that sway you away from working with all sizes of your designs. You can create awards, decorative pieces, pet memorial tiles, and more.
Laser Engraving Project #6: Pet Portrait and Memorials
Honoring Our Furry Friends


Pets are an important part of many people’s lives. Creating engraved pet portraits or memorials can be a meaningful and profitable project.
How to Create Pet Memorials
- Get a Good Photo: High-quality images make better engravings.
- Edit the Image: Adjust contrast and brightness.
- Engrave with Care: Pay attention to intricate details in the pet’s features.
- Finish Nicely: Add a stand or frame if needed.
- Include Personal Messages: Add the pet’s name or a special quote.
- Choose the Material: Wood, stone, or brick can be used.
Ideas for Pet Memorials
- Engraved Stones: For gardens or memorial sites.
- Wall Plaques: To display indoors.
- Keepsake Boxes: Engraved boxes to hold mementos.
- Jewelry: Small pendants with pet engravings.
Tips for Success
- Be Compassionate: Understand that customers might be grieving.
- Offer Custom Options: Include names, dates, or an intricate design.
- Provide Quality: Ensure the final product is something the customer will cherish.
- Follow Up: Offer support or additional services.
The pet memorial market demands innovative designs, new product development, and personalized laser engravings. One of our customers successfully launched a pet memorial business and is now earning $23,000 per month.
If you’re unsure where to begin, here’s a tutorial video that provides step-by-step instructions on designing and engraving a pet memorial marker.
Looking for blank pet memorial markers? Here’s where you can order your blank stock and get started today!
Exploring Larger Projects

Thinking Beyond Small Items
Once you’re comfortable with basic projects, consider taking on larger laser engraving tasks.
Ideas for Big Projects
- Outdoor Features: Garden signs, benches, or decorative panels with intricate designs.
- Business Signage: Large signs for shops or offices.
- Home Decor: Big wall art with acrylic material.
- Architectural Elements: Engraved pillars or beams.
Benefits of Large Projects
- Higher Profits: Bigger items can sell for more money.
- Less Competition: Fewer people tackle large projects.
- Greater Impact: Large pieces can attract more attention.
Tip for Success
- Plan Carefully: Larger projects need more planning.
- Understand Your Machine’s Limits: Make sure your laser engraver can handle the size.
- Market Effectively: Showcase these big items in your portfolio.
- Collaborate: Work with carpenters or builders if needed.
Bonus Projects for Laser Cutters and Engravers
Home Decoration Items

Creating home décor is a fun way to use your laser engraving skills.
Ideas Include:
- Customized Mirrors: Engrave designs on mirror surfaces.
- Wall Art: Inspirational quotes or intricate patterns.
- Clocks: Personalized clock faces.
- Lamp Shades: Engrave designs on wooden or acrylic shades.
Maps and Terrains
People enjoy decorative maps and terrain models.
- City Maps: Highlight local landmarks.
- 3D Terrains: Layer materials to create depth.
- Personalized Maps: Mark special places.
- World Maps: For educational or decorative purposes.
Mounted Decorations and Wall Art


Make your customers space unique with custom decorations.
- Name Signs: Perfect for kids’ rooms or family names.
- Seasonal Décor: Items for holidays like Christmas or Halloween.
- Abstract Art: Creative designs for modern homes.
- Photo Engravings: Turn photos into engraved art.
Key Holders

Functional and stylish, key holders are always useful.
- Family Themes: Include family names or initial letters.
- Themed Designs: Animals, nature, or hobbies.
- Multi-Purpose: Combine with shelves or hooks for more functionality.
- Magnetic Holders: For a modern touch.
Drink Coasters


Small but practical, coasters can be customized with a laser cutter.
- Personalized Sets: Names or monograms.
- Themed Collections: Favorite sports teams or movies.
- Gift Sets: Bundle coasters with mugs or glasses.
- Promotional Items: For businesses to give to clients.
Getting Started with Your Laser Engraving Business
Investing in Equipment
If you don’t have a laser engraver yet, consider the following:
- Research: Find a machine that fits your needs and budget.
- Learn the Software: Familiarize yourself with design programs.
- Practice: Spend time getting to know how your machine works.
- Consider Upgrades: Think about future needs.
Building a Portfolio
Showcase your work to attract customers.
- Take Good Photos: Quality images of your projects.
- Create a Website or Social Media Page: Share your creations online.
- Gather Testimonials: Happy customers can help promote your business.
- Display Samples: In local shops or at events.
Marketing Your Products
Get the word out about your laser engraving services.
- Attend Craft Fairs: Sell your items in person.
- Partner with Local Stores: Offer your products in shops.
- Use Online Marketplaces: Sell on platforms like Etsy or Amazon Handmade.
- Offer Promotions: Discounts or specials for first-time customers.
Providing Excellent Customer Service
- Communicate Clearly: Keep customers informed.
- Meet Deadlines: Deliver products on time.
- Ensure Quality: Always strive for the best workmanship.
- Handle Feedback Positively: Use it to improve your services.
Conclusion
Laser engraving is a fantastic opportunity for beginners to create beautiful, personalized items. By starting with simple projects and gradually taking on more complex tasks, you can develop your skills and build a successful business.
Key Points to Remember
- Start Simple: Begin with easy projects to build confidence.
- Practice Safety: Always follow safety guidelines.
- Stay Creative: Let your imagination guide you.
- Engage with Others: Learn from the community and share ideas.
- Focus on Quality: Provide products that customers will love.
- Keep Learning: Technology and trends change; stay updated.
By following these steps and exploring the projects mentioned, you’re on your way to becoming proficient in laser engraving. Whether for fun or profit, laser engraving can be a rewarding and enjoyable endeavor.
Additional Resources
- Tutorial Videos: Watch online tutorials to learn new techniques.
- Design Software: Use programs like Inkscape or Adobe Illustrator.
- Join Communities: Participate in forums or social media groups.
- Books and Guides: Read more about techniques and best practices.
Final Thoughts
Remember, every expert was once a beginner. Don’t be afraid to make mistakes and keep learning. With dedication and creativity, you can turn simple materials into works of art with laser engraving.
Happy engraving!
If you don’t yet have your laser but are ready to create priceless products like the ones in this article, call us at 800-585-8617, use the chat feature on our website, or schedule a live demo.


0 Comments