
TL;DR: Learn how to laser cut a multi-layer acrylic sign with a 100-watt AP Lazer CO2 laser. This guide covers preparing an acrylic sign DXF file or other vector artwork, separating six design panels in LightBurn, sizing the artwork for 24 x 24 inch acrylic, and using tested speed and power settings for 1/8-inch acrylic. Cut each layer separately, keep the pieces in order, then stack and frame them to create colorful dimensional wall art.
Multi-layered acrylic signs turn an otherwise flat design into something with real color, depth, and presence.
Each part of the artwork is cut from a separate sheet of acrylic, coming together to make something truly unique.
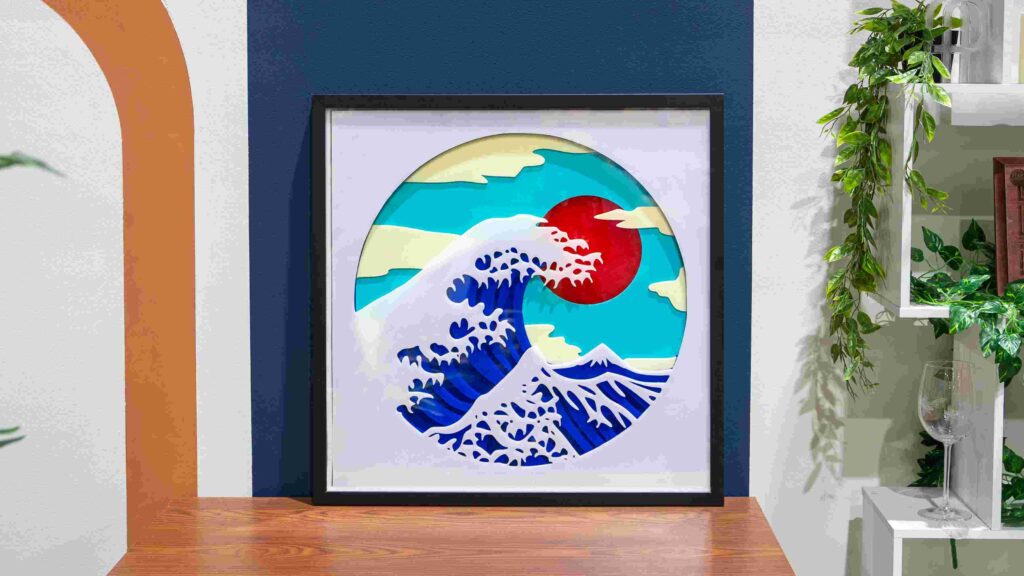
This project in particular uses six separate vector panels to create a colorful design inspired by Hokusai’s The Great Wave off Kanagawa. The artwork is first prepared as clean cut vector lines, then arranged in LightBurn and cut one panel at a time from 1/8-inch acrylic. The finished piece is approximately 24 x 24 inches and is displayed in a square shadowbox frame.
What You'll Need to Get Started
- Six 24 x 24 inch Sheets of Colored Cast or Extruded Acrylic
- 3M Acrylic Tape, Super Glue, or Acrylic Solvent
- A 24 x 24 inch Shadowbox Frame
- LightBurn or Preferred Laser Processing Software
- Vector Design Files
- CO2 Laser Machine
Before You Begin
Think of a multi-layer sign as a stack of simple shapes. One sheet may create the background. Another may add a wave, sun, lettering, logo, or other detail. Every sheet contributes one part of the finished picture.
The most important part is keeping the layers organized. Each panel should use the same overall size and position so the pieces line up when they are stacked.
This project uses vector artwork. A vector file is made from lines and curves instead of pixels, which gives the laser a clean path to follow. A DXF file is the most practical choice for laser-cut signs because it keeps the artwork as editable cut lines. SVG and AI files can also work well.
Before processing for cutting, confirm:
- The artwork has six separate panels or layers.
- Each panel is assigned to the correct acrylic color.
- The outside dimensions fit the material.
- Fine details are large enough to cut cleanly.
- The sheets are the same thickness.
- You know the order in which the finished pieces will be stacked.
Test your machine’s speed and power settings on a scrap piece of acrylic before cutting the full design.
Acrylic color, type, thickness, masking, focus, and machine condition can all affect the result.
Prepare the Layered Sign File
Step 1: Build or Open the Vector Artwork
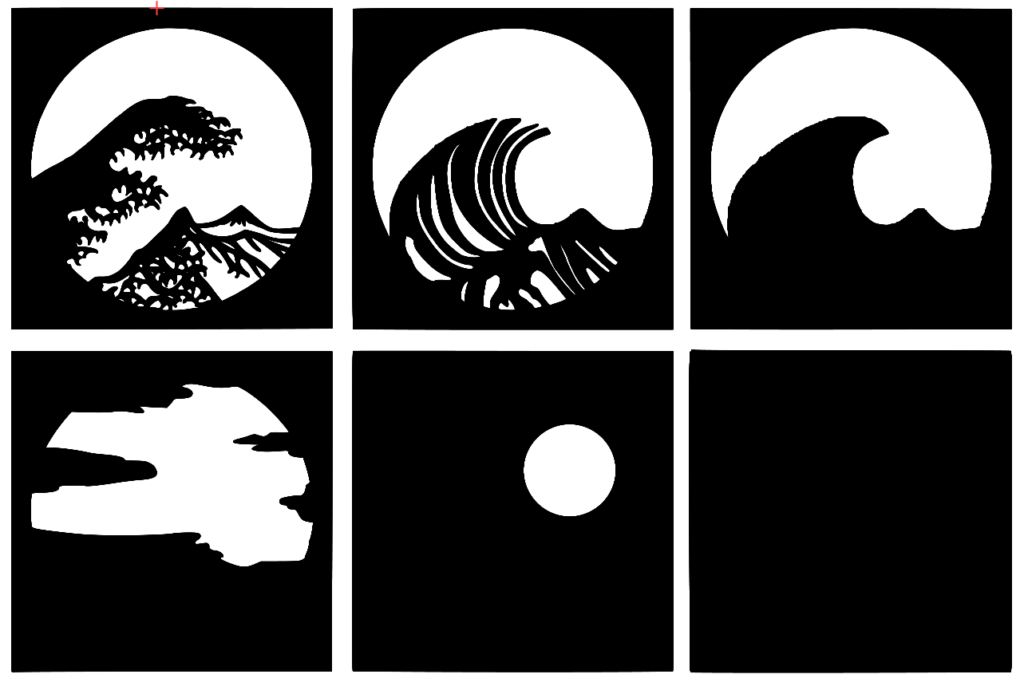
Create the layered artwork in CorelDRAW, Adobe Illustrator, or another program that can produce clean vector paths. Alternatively, download our laser-ready design files here:
If you already have an acrylic sign DXF file, open it and check that every shape is made from a clean outline. Remove duplicate lines and make sure each shape is closed where it needs to be.
Keep each color or sign layer on its own panel. This makes it easier to cut the design from separate sheets of acrylic.
Step 2: Give Every Panel the Same Outer Size
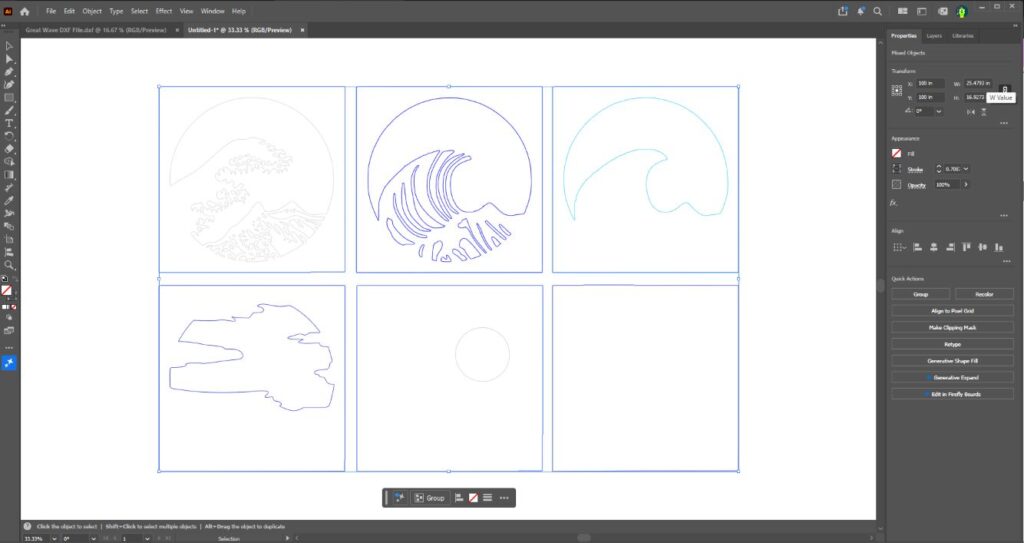
Each panel should share the same overall dimensions and artwork position. This keeps the finished design aligned from front to back.
Do not resize one panel on its own. If the design needs to be larger or smaller, select all the panels and resize them together.
Step 3: Plan the Layer Order
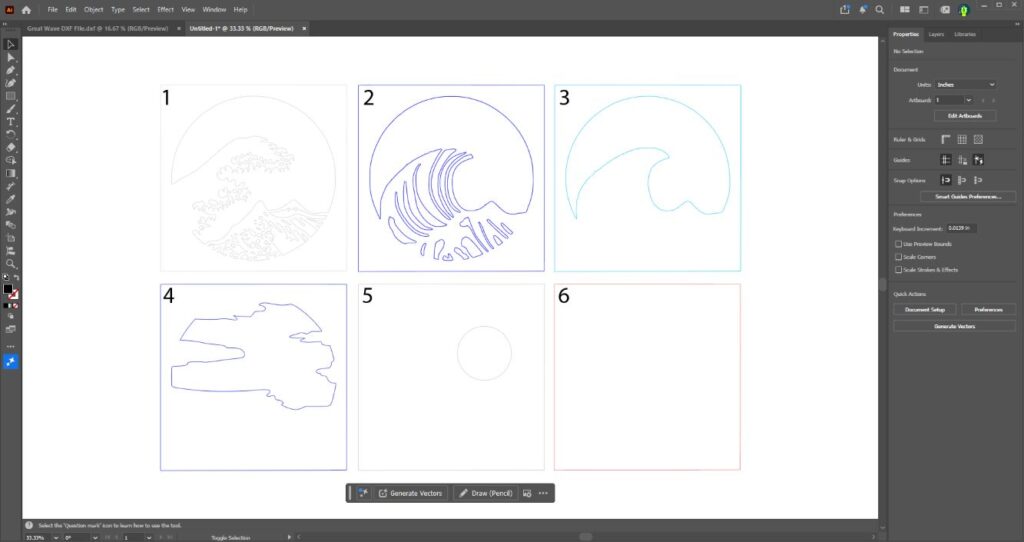
Decide which panel will sit at the back and which details will sit closer to the front.
A simple written list can save time later. Number the panels from back to front and note the acrylic color beside each one.
For example, on our Great Wave piece:
- White foam
- Dark blue wave accents
- Light blue wave form
- Off-blue sky
- White clouds
- Red sun/background
Set Up the Artwork in LightBurn
Step 1: Open LightBurn and Import the File
Video timestamp: 0:16
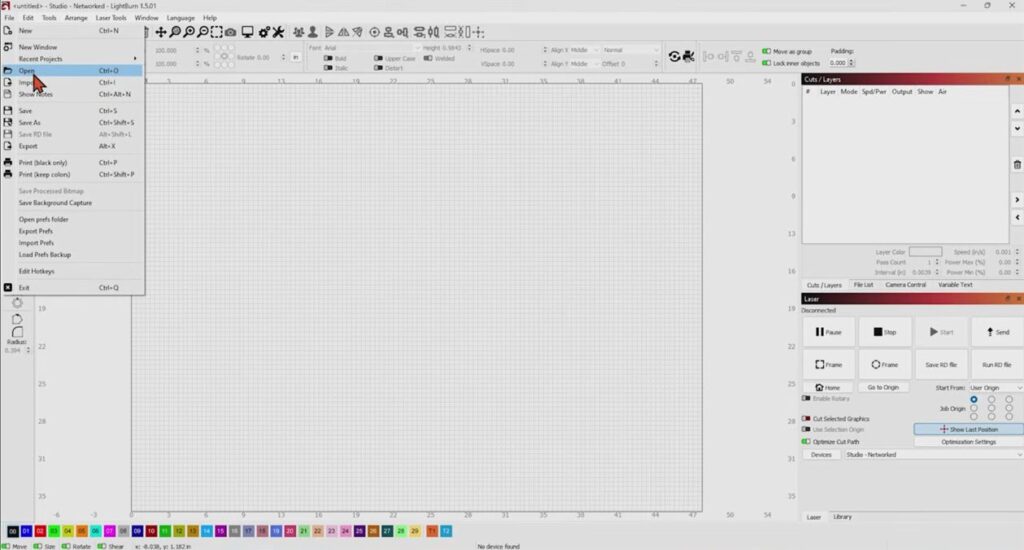
Open LightBurn, then go to File > Open or File > Import, depending on the file you are using.
Choose the prepared DXF file, SVG, AI file, or LightBurn project.
Once it opens, zoom in and make sure the artwork looks complete. Check circles, corners, narrow details, and the outside border of each panel. Delete any extra noise or incorrect artwork pieces. Edit nodes, as necessary.
Step 2: Check the Six Panels
Video timestamp: 0:46
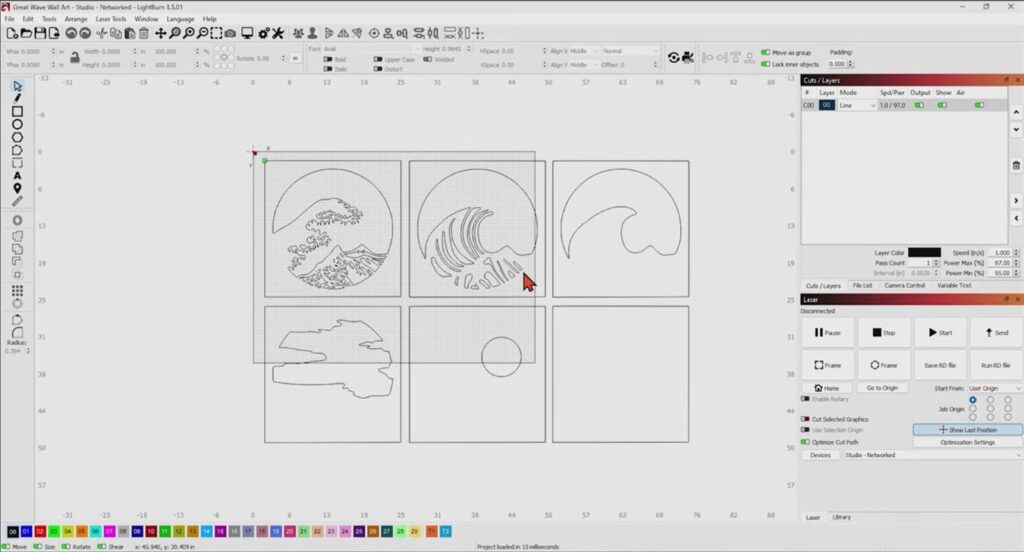
The full design contains six separate panels. They do not all need to sit on the laser bed at the same time.
Check that each panel contains the correct shapes for its acrylic color. If a shape appears on the wrong panel, move it before cutting.
Step 3: Isolate the First Panel
Video timestamp: 1:00
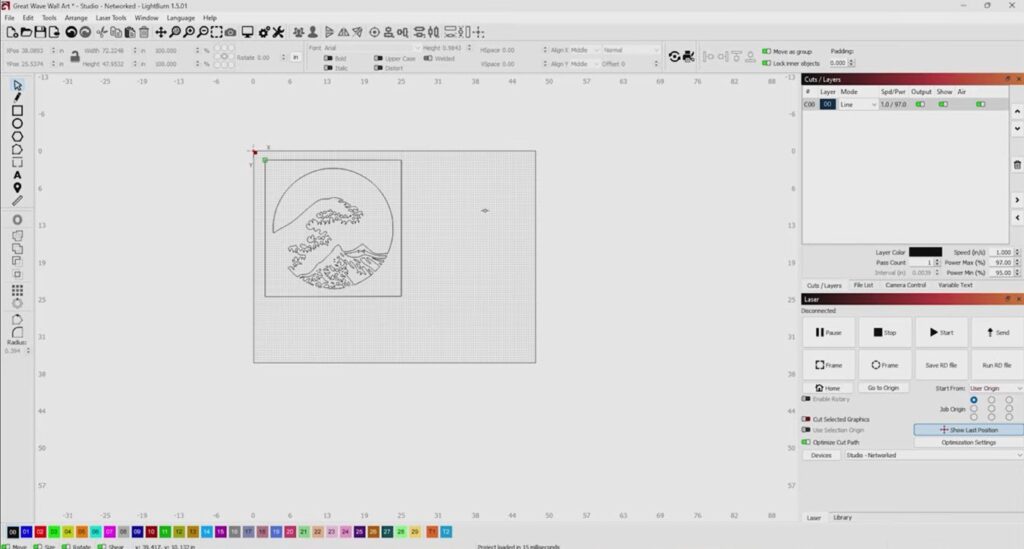
Start with the first acrylic color or layer.
Select the five panels you do not want to cut and remove them from the workspace. Leave only the first panel visible.
When ready, send that panel to the laser to run, then use “undo” to bring the full design back.
Isolate the next panel and repeat the process.
If you prefer, you can also save each panel as its own file before cutting. Choose the method that makes it easiest for you to stay organized.
Helpful tip: Save a master copy of the complete design before deleting or hiding anything. That gives you a clean file to return to if you make a mistake.
Step 4: Size the Artwork for the Acrylic
Video timestamp: 1:31
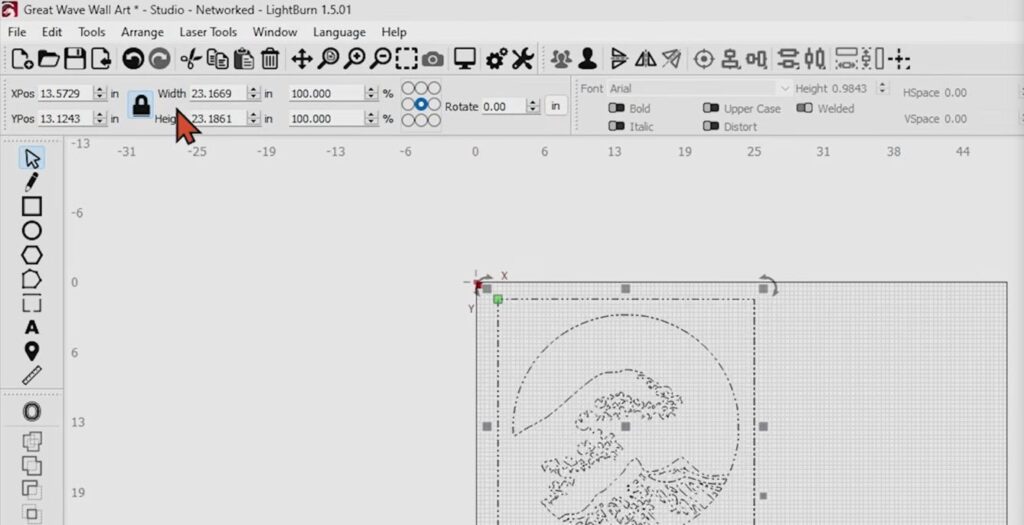
Select the remaining panel and check its width and height at the top of the LightBurn screen.
The acrylic sheet is 24 x 24 inches. The design is kept slightly smaller, at about 23.17 x 23.19 inches, to leave a narrow margin around the edges. You can also skip cutting the outside boarder if you know your material is exactly 24 x 24 inches, only cutting out the interior of the piece, instead.
Turn on the size lock before making changes. This keeps the width and height connected so the design does not stretch.
Add the Acrylic Cutting Settings
Step 1: Choose Line Mode
Video timestamp: 1:59
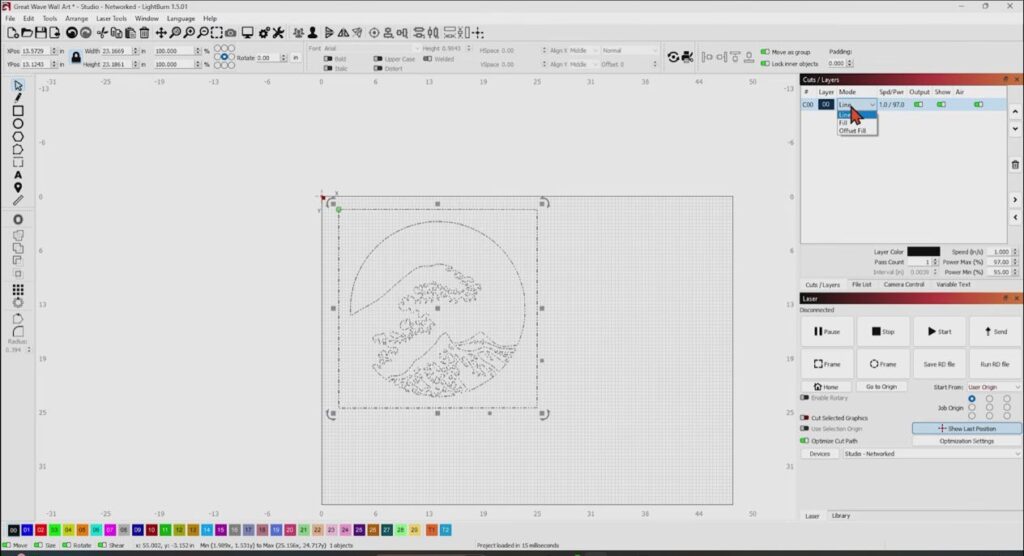
Double-click the color layer to open the cut settings.
Set the mode to “line.” Line mode tells the laser to follow the vector paths and cut the shapes from the acrylic.
Make sure the layer output is turned on.
Step 2: Enter the Starting Settings
Video timestamp: 2:18
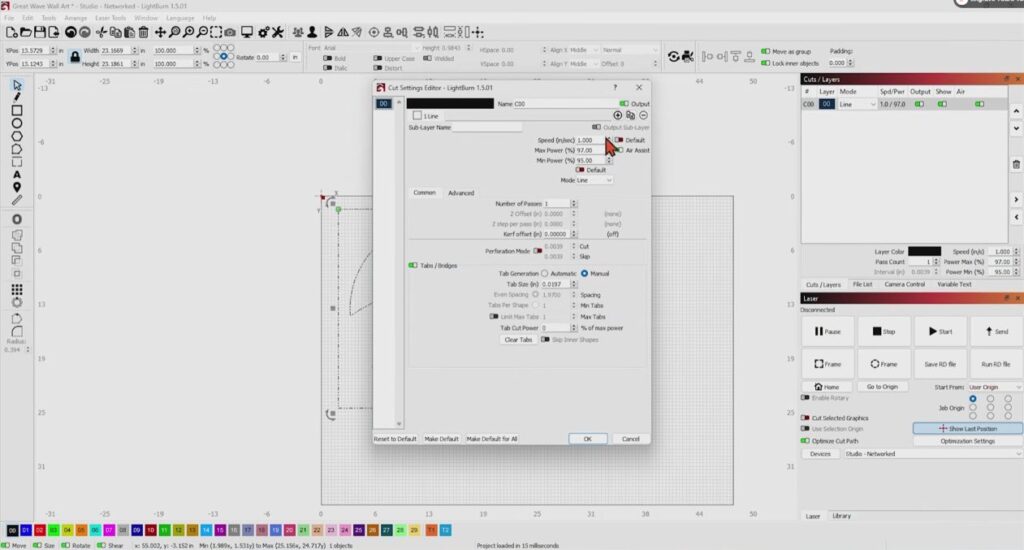
The following settings are used for 1/8-inch acrylic on a 100-watt AP Lazer SN4836DLR:
- Mode: Line
- Speed: 1 inch per second
- Maximum power: 97 percent
- Minimum power: 95 percent
- Passes: 1
- Air assist: On
These are starting settings for the material and machine used in this project. Test your acrylic before cutting the full 24-inch panel.
If the test does not cut through cleanly, check the focus, material thickness, masking, and machine condition before changing the power or speed.
Double Check Your File!
Before sending the job over to the machine, look over the panel one more time.
Check that:
- Only one panel is visible.
- The artwork fits on your selected acrylic sheet.
- Line mode is selected.
- The layer output setting is set to “on.”
- The speed and power settings match your tested settings.
- The correct acrylic color is in the machine.
Cut Each Acrylic Layer
Step 1: Position the First Sheet
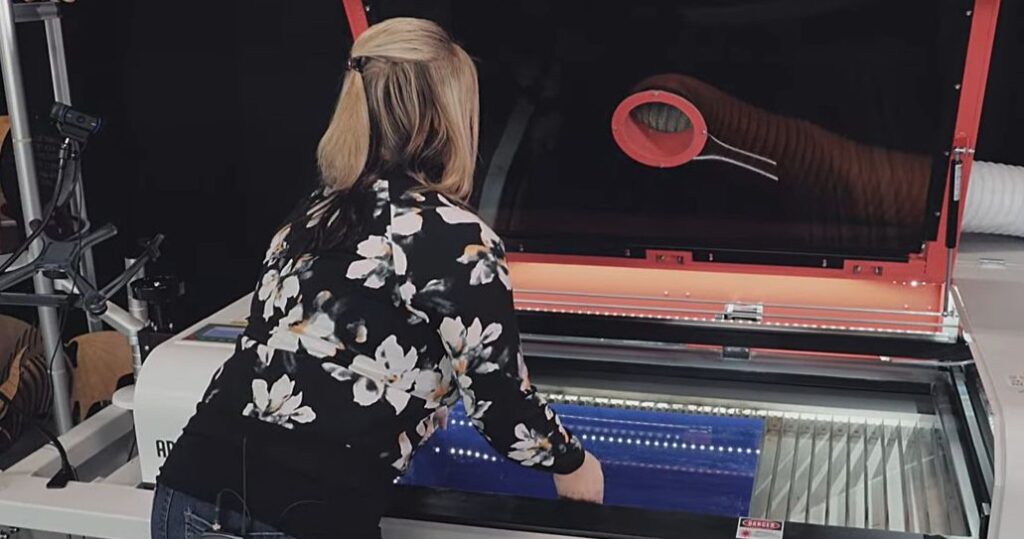
Place the first 24×24-inch acrylic sheet on the cutting surface.
Focus the machine and check the starting point using your normal AP Lazer process. Turn on the ventilation and air assist required for acrylic cutting.
Use LightBurn’s framing feature or your regular placement method to confirm that the design stays inside the sheet.
Step 2: Send the First Panel
Video timestamp: 2:32
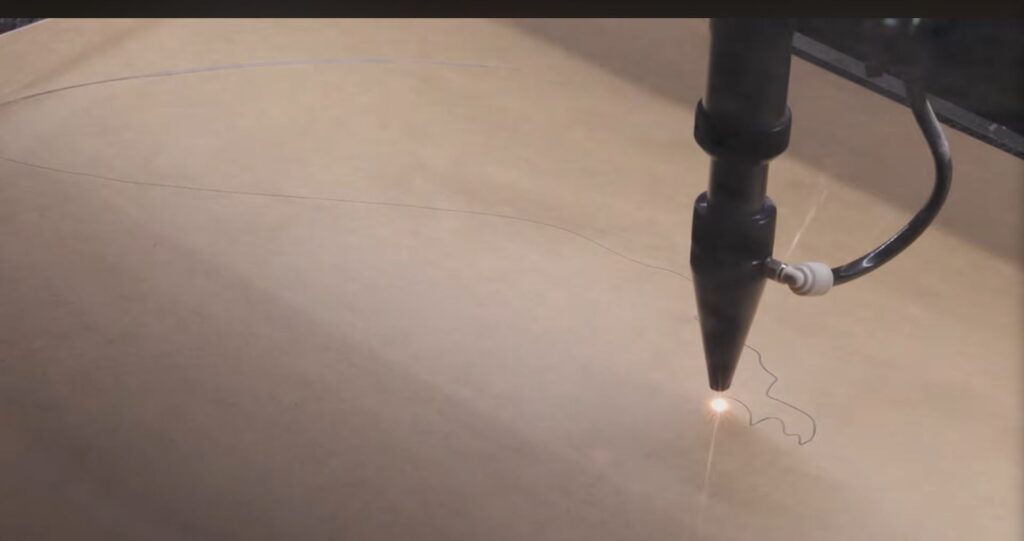
Send the first panel to the machine and begin the cut.
Stay with the machine while it runs and follow your normal shop safety procedures.
Step 3: Remove the Cut Pieces
Video timestamp: 2:50
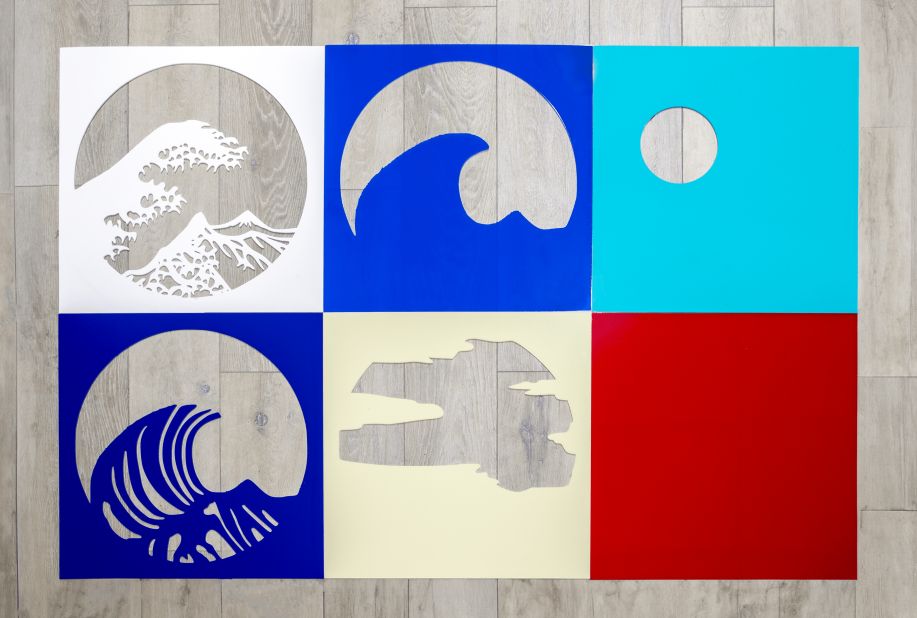
Once the cutting cycle is complete and the material is safe to handle, remove the sheet carefully.
Lift out the cut pieces without forcing narrow details. If a section does not release, stop and check whether the cut went all the way through.
Keep every finished piece with its panel number or acrylic color. Small shapes can be easy to mix up.
Step 4: Restore the Full Design
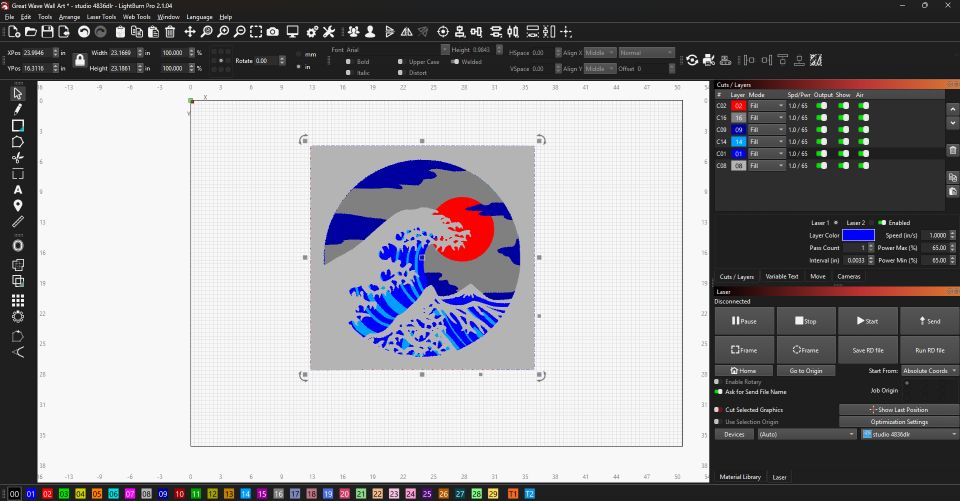
Return to LightBurn and use Undo to restore the other panels.
Remove the panel you just cut, then leave the next panel visible. Place the matching acrylic color in the machine and repeat the same setup.
Continue until all six panels are cut.
Organize and Assemble the Layers
Step 1: Dry-Fit the Sign
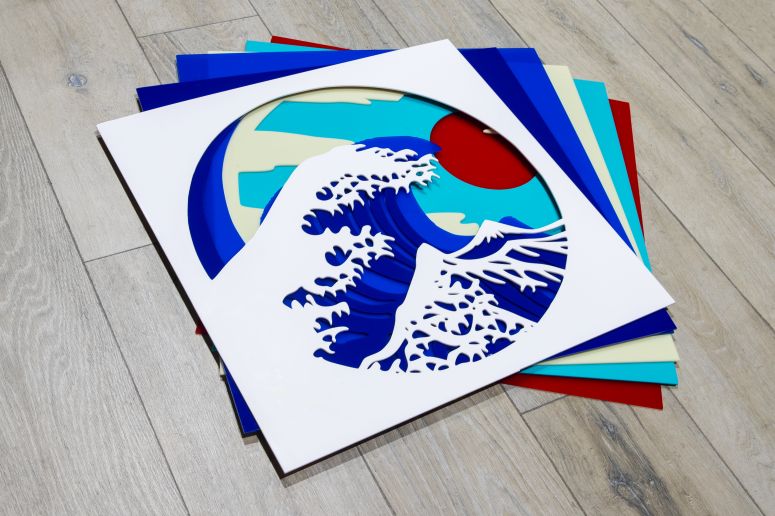
Before using any adhesive or mounting method, place the layers together without attaching them.
Start with the back panel and add one layer at a time. Check the outside edges and important design details as you go.
If the panels share the same overall size and position, the artwork should line up naturally.
Stand back and look at the full design. Make sure every color is in the intended position and that no layer is upside down or reversed.
This is the easiest time to correct the order.
Step 2: Attach the Layers
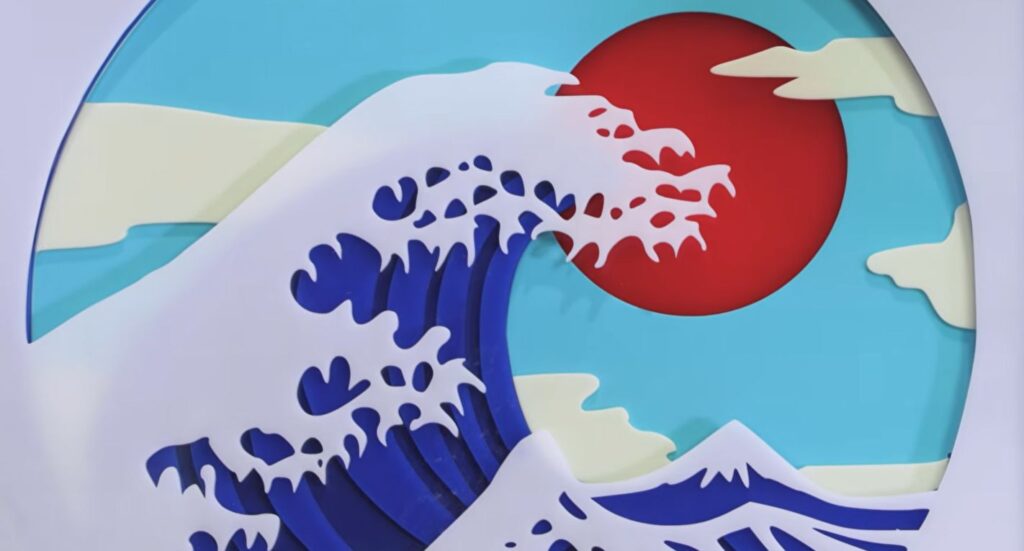
Use an assembly method that is compatible with the exact acrylic in your project. The best choice depends on the acrylic finish, whether the layers are clear or opaque, and whether the sign will be framed.
Apply the chosen method sparingly and keep it away from visible edges. Test it on scrap acrylic first to make sure it does not cloud, stain, or damage the surface.
Step 3: Add the Frame
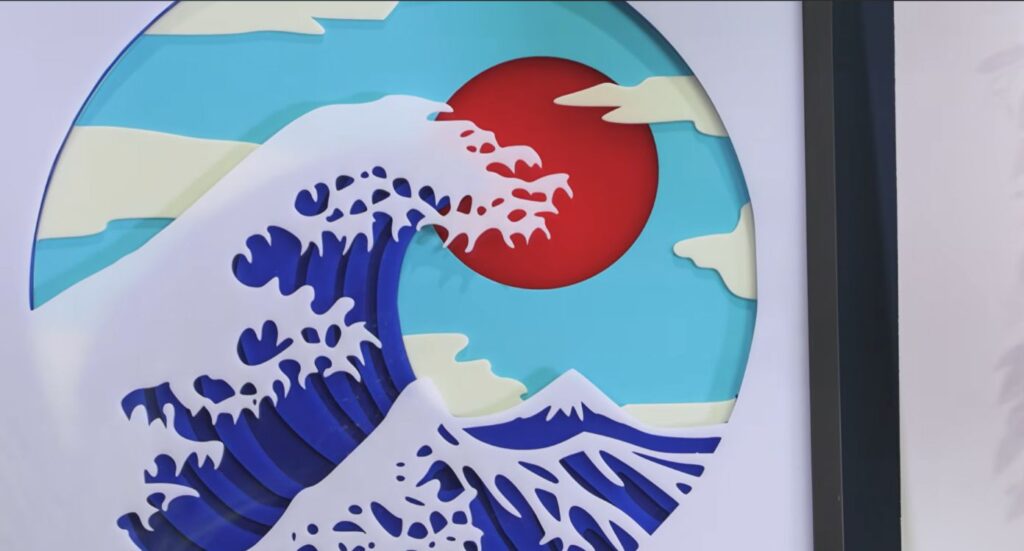
Place the completed acrylic artwork into its frame.
Check that the sign sits flat and that the frame does not cover important parts of the design.
The Completed Project and Final Thoughts
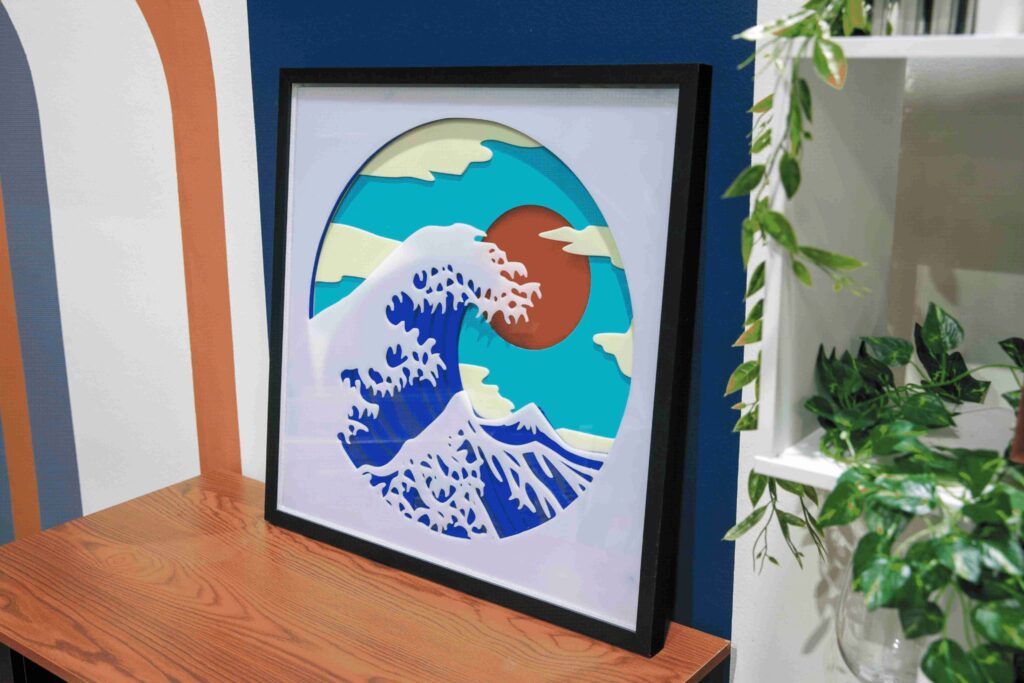
The finished sign combines six colorful acrylic panels into one large three-dimensional masterpiece.
Once you understand the basic process, you can use the same approach to create an entire world of wall art. The design may change, but the workflow stays simple: prepare clean vector layers, size them together, cut one acrylic color at a time, keep the pieces organized, and check the full arrangement before final assembly.
Layered acrylic signs are also a strong addition for sign shops and custom-product businesses. One well-planned file can become a repeatable product that is easy to personalize with different colors, names, logos, or themes.
Looking for more ideas?
Explore AP Lazer’s acrylic application page or learn more about the current SN4836DLR laser machine.
If you need help choosing a machine for the products you want to create, contact an AP Lazer specialist or call us today at 800-585-8617.